Airtime 2.3 for Broadcasters
Now playing
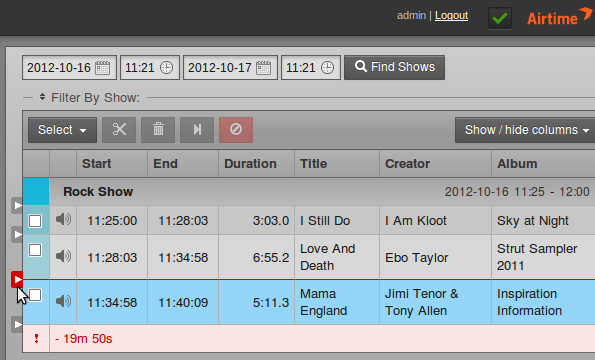
The Now Playing page provides a view of the content your station will play out, or has already played out, which defaults to showing the 24 hours ahead. This page also enables you to make last-minute changes to running shows.
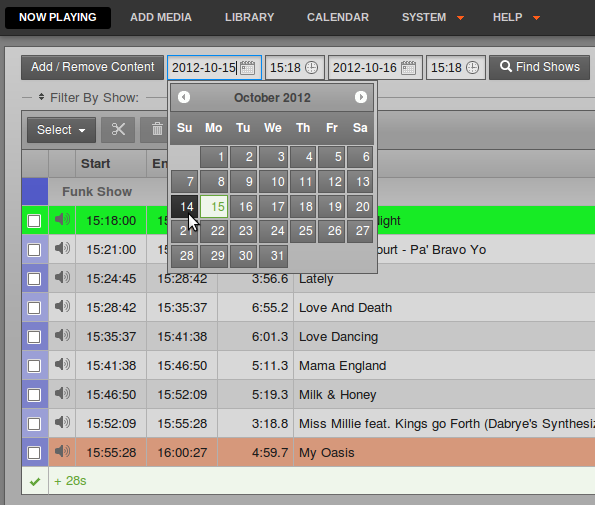
If you've only just installed Airtime, there might not be any content shown yet. Click the calendar and clock icons above the table to change the date and time range, then click the Find Shows button (with the magnifying glass icon) to the right.
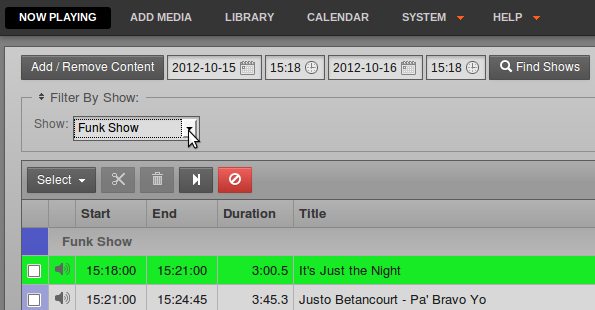
To display the content of a particular show, click Filter by Show and select the name of the show from the drop-down menu which will appear.
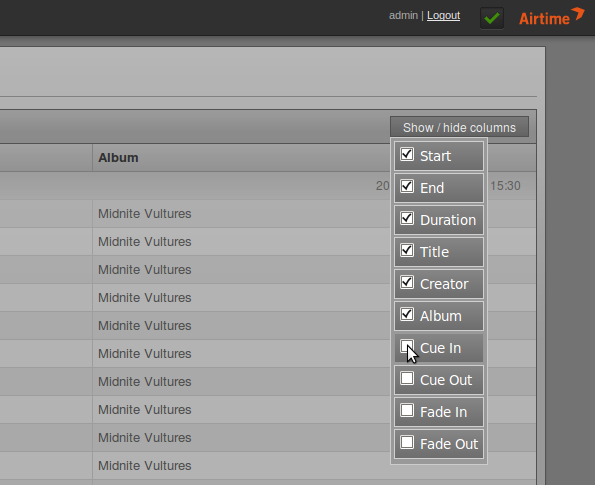
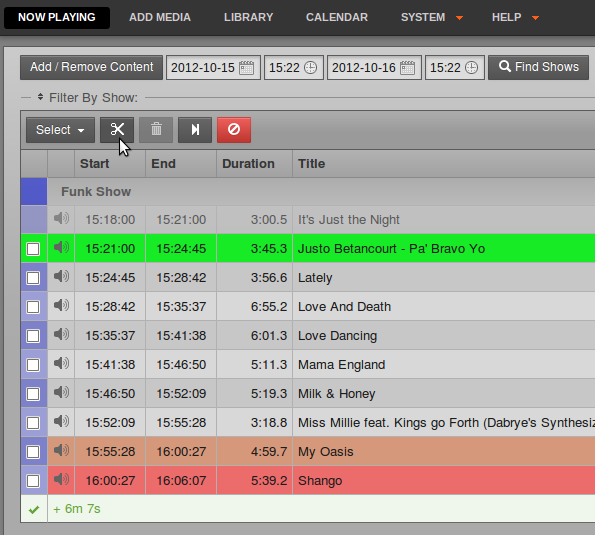
On the left side of the page, the Start and End times, Duration and Title of each content item are shown. On the right, Creator, Album, and Cue or Fade times can also be shown. This information can help you to prepare voice tracks for insertion into the show, including time checks if you wish. Putting current time information into voice tracks describing specific content can, of course, limit the re-usability of those voice tracks, unless you always broadcast the same content at the same time of day.
Click the Show/hide columns button on the right to configure the metadata displayed, by checking the boxes in the pop-up window.
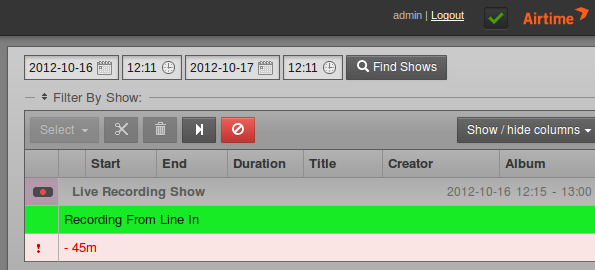
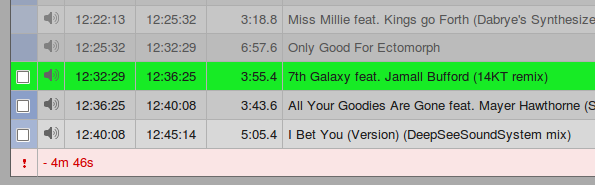
The row for the currently playing item is displayed with a bright green background. Any underbooked shows (shows with insufficient content to fill the time allowed) are displayed with a row indicating the length of the underbooking in minutes and seconds. These rows contain a red exclamation mark in the first column, and have a pink background.
Removing content from a running show
If a show is overbooked, which means the total playout duration is longer than the time allowed for the show, a brown row indicates that the item will be faded out when the show ends. A red row indicates that the item will not be played at all. The length of the overbooking is shown in minutes and seconds in the last row of the show. To remove the extra items from the end of an overbooked show, click the Scissors button at the top left of the table.
Alternatively, check the boxes for items which have not yet completed playout, and click the Trashcan button, to the right of the Scissors, to remove them from the schedule. If you remove the currently playing item, playout will skip to the next item in the show automatically, so you should make sure you have enough items remaining in the show to avoid dead air.

If you have a long schedule displayed, and you wish to skip to the currently playing item, click the button with the end arrow icon, to the right of the Trashcan.
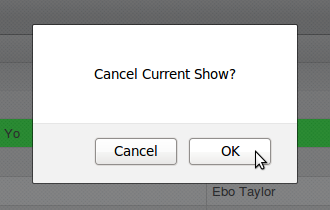
To cancel the current show completely, click the red button to the right again. A pop-up window will ask you to confirm the cancellation, as this action cannot be undone.
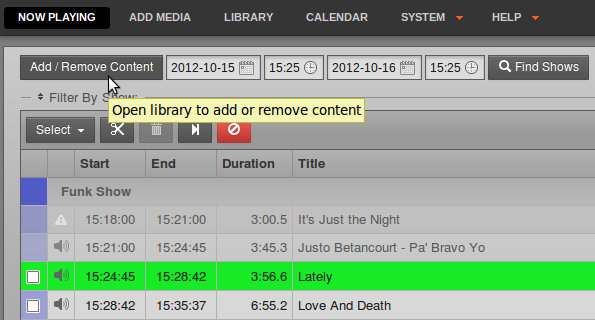
Items which are no longer available have an exclamation mark icon in the second column. This may happen for media files which were part of previous shows, and were removed from Airtime's Library (main storage or watched folders) subsequently. Items which are included in forthcoming shows cannot be removed from the Library via the Airtime interface.
![]()
Advanced and simple library searches
In the top left corner of the page is an Add / Remove Content button which enables you to open Airtime's library.
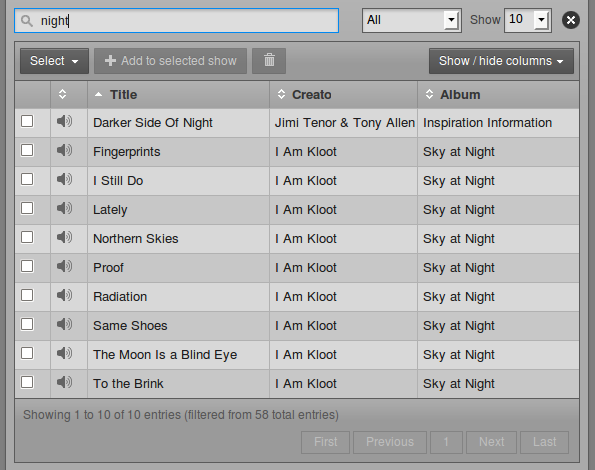
In the library table which opens, the upper section is for the Advanced Search Options, which enable you to search within individual fields of the database such as Title or Creator. Like an Internet search engine, you do not have to type in the correct upper or lower case, press the Enter key, or even type the whole of the search term before matches from the Airtime library are displayed.
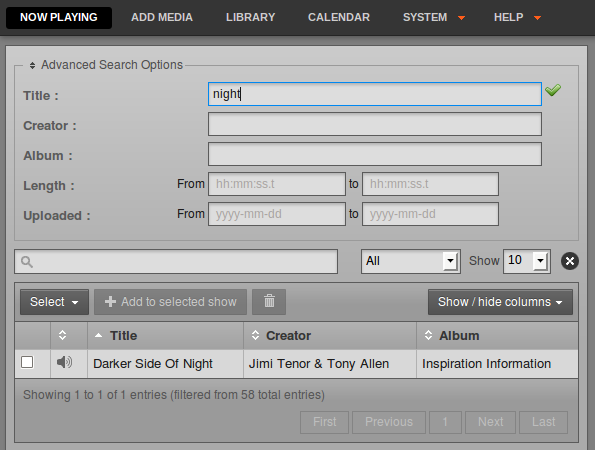
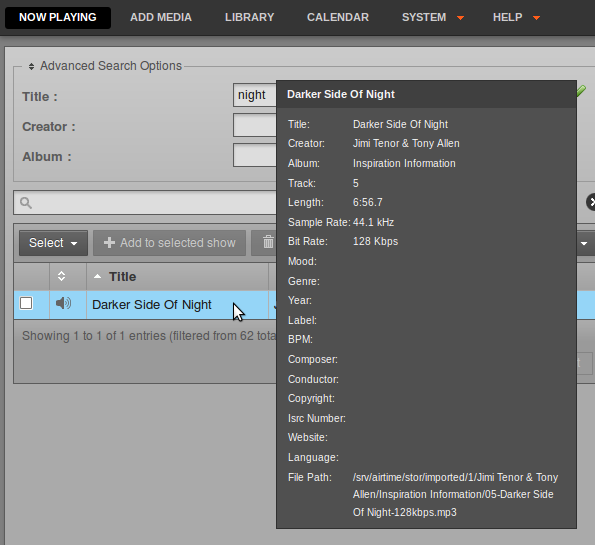
At the bottom of the library table, click the First, Previous, Next, Last or individual page number buttons to browse the search results. Right-clicking an item in the search results will display the available metadata for that item in a pop-up window.
The columns displayed in the search results correspond to the fields available for advanced searches. To change the fields which can be searched, click the Show / hide columns button on the right side of the table, just above the search results.
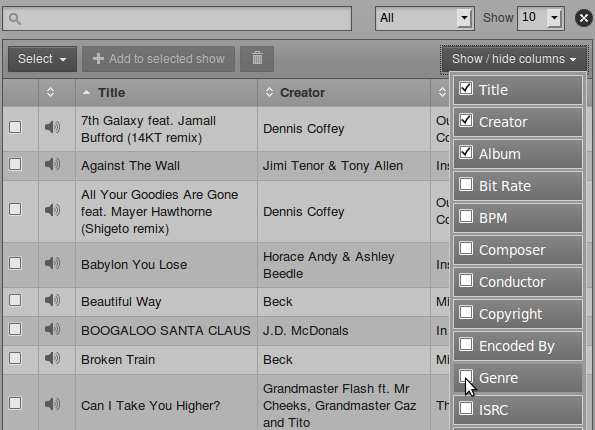
Click the metadata column headings such as Title, Creator, Album, or Genre to sort the entries in ascending or descending order. In the second column, audio files are represented by a loudspeaker icon, while playlists are represented by a document icon. Smart blocks have a think bubble icon, and web streams have an arrow icon.
To find all files uploaded by yourself, or another specific member of the station staff, click the Show / hide columns checkbox which enables the Owner column. After you have made your search, you can click the header of the Uploaded column to find the items that person added to the server most recently.
Advanced search terms are matched using 'and' rather than 'or' logic, to narrow your search. Perhaps you have tagged some jazz-flavoured station idents intended for use in a particular show called 'Jazz Maverick' with the Album tag of Jazz Maverick and a Genre of Ident. You could then find exactly the idents you are searching for by typing maverick and ident into the respective advanced search fields.
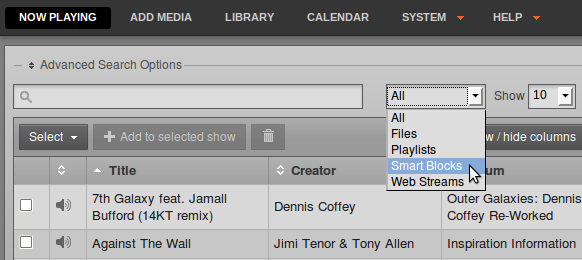
Use the drop-down menu at the top of the search results to display Files, Playlists, Smart Blocks, Web Streams or All items. By default 10 items are listed, but you can click the Show drop-down menu to change the list length to between 5 and 100 items.
Click the Advanced Search Options link to collapse that area. Beneath the collapsed link is the Simple Search field, with a magnifying glass icon, which enables the selection of items based on any tag metadata stored in the Airtime database, whether that metadata column is currently displayed in the table or not. For example, to search for all items between four and five minutes duration, enter 00:04 into the simple search field (for hours and minutes).
If your jingles are tagged with Jingle in the Genre or other fields, you can very easily find them by entering jingle into the simple search field. The same technique can be used to find advertising and promotional files. (See the chapter Preparing media for ingest for tips on batch tagging files with metadata). Unlike advanced searches, simple searches use 'or' logic for multiple search terms, so a simple search for jingle ident will return items matching either keyword.
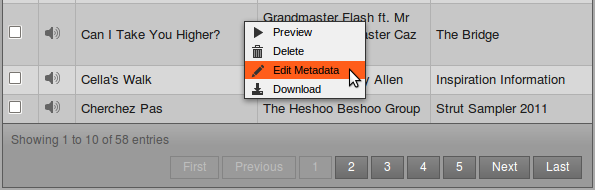
Clicking on an item in the library table opens a pop-up menu which enables you to audition the item, or remove it from the Airtime library. The Delete option should be used with caution, because this action cannot be undone. For media files, you can also Edit Metadata stored for that file, or download the file to your local computer, using this menu.
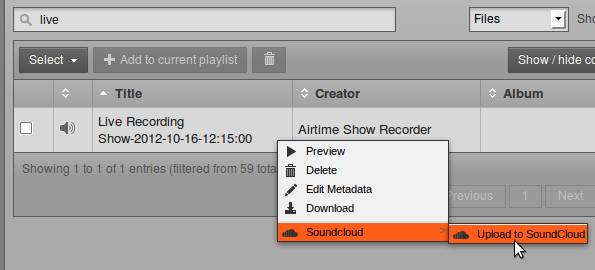
If the Enable SoundCloud Upload box on the Preferences page is checked, there will be an additional option on the pop-up menu, Upload to SoundCloud. As mentioned previously, you should only upload audio files to SoundCloud with the permission of the copyright holder.
Adding content to a running show
After you have found the items that you want using the search tools, you can then drag and drop them from the library table on the left side of the page into the shows on the right side, including the current playing show.
If the current show has nothing playing out at the time, the new item will begin playing immediately. This manual triggering of playout can be used as a live assist technique, in which the Airtime server's soundcard output is mixed with other sources such as microphones or telephone hybrids on its way to a transmitter, or a separate stream encoder. For instance, a live show's host may not wish to cut off a studio discussion in order to play music at a fixed time.
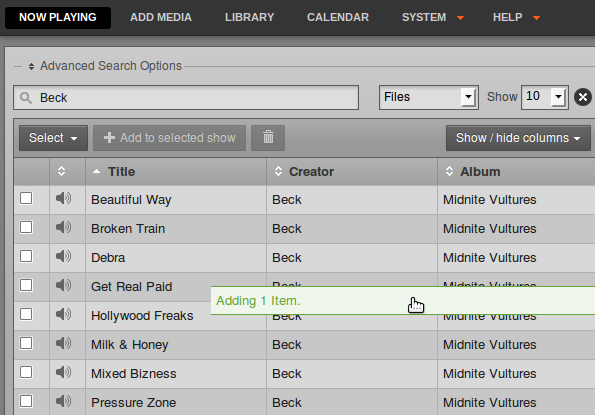
You can also select multiple items using the Select menu button, just beneath the simple search field, which has the options to Select this page of search results, Deselect this page and Deselect all. Alternatively, use the checkboxes on the left side of the library table to select specific items. Then drag one of the items into the show to add all of the selected items, or click the Add to selected show button, which has a plus icon. If you wish, you can also use the Trashcan button to permanently remove items from Airtime's library. Only admin users have permission to delete any item.
To insert checkbox selected items at a specific time in the show schedule, click one of the grey and white triangle icons on the left side of the schedule table, which will change to red and white. A red horizontal line will be shown at the insertion point. Then click the Add to selected show button in the library table.
To add a single item at the insertion point, double-click on it in the library. There is no need to select the item by checking the box in the first column.
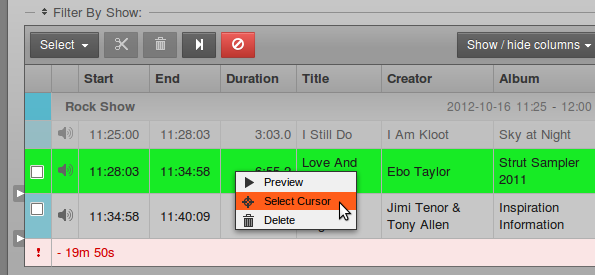
Another way to create an insertion point is to click an item in the show table, then click Select cursor on the small pop-up menu that will appear. This pop-up menu also enables you to audition the entire show in advance of playout, or remove the item that was clicked on from the show.
Multiple insertion points can be enabled, so that the same item is inserted into the schedule at different times. For example, you may wish to play a news report every hour, or a station ident after every five music files.
A live show set for recording from the Airtime server's sound card is displayed with a red dot icon in the first column. It would not contain any files or playlists, smart blocks or web streams.