The Storyteller theme for Newscoop
Preparation
In this manual, you will see screenshots from a real story that I created using Storyteller. I am not a developer or a particularly technically inclined individual. I created this example story in two days and took notes throughout the process. What follows are my observations, comments and tips. You can view the full example story here: http://bit.ly/1fwad3o
Okay, so first things first, you need to make an outline of your story. You don't have to stick to it, but you should have a general idea of what you want your story to look like, what types of media you want to include and so on. You could make a simple outline, or go as far as storyboarding the whole thing. This entirely depends on the magnitude of your story and your general level of ambition.
So, let's get started.
-
Open the Newscoop administration interface at https://example.newscoop.com/admin (where example.newscoop.com is the URL of your publication instance)
-
Download the Storyteller theme from Github
-
Create a new issue in your instance
-
Upload the Storyteller theme (Configuration -> Themes -> Import theme)
-
Add the theme to your publication
-
In 'issue configuration', assign the Storyteller theme to the newly created issue
-
Create two article types: 1) 'storyteller' and 2) 'ST_element'
-
Publish a new issue (+ New Issue)
-
Create a new section as a placeholder for your first story - This is your new story. If others are using the same Newscoop instance, this is where their stories will appear as well.
-
Click on the new section then choose the plus sign at the top 'Add article'
-
Here, give your article a title (this will be for your reference later on, so be sure to make it descriptive).
-
There will be a dropdown on this page for article type. This part is important: The first article type you will make will be Article type: “storyteller”
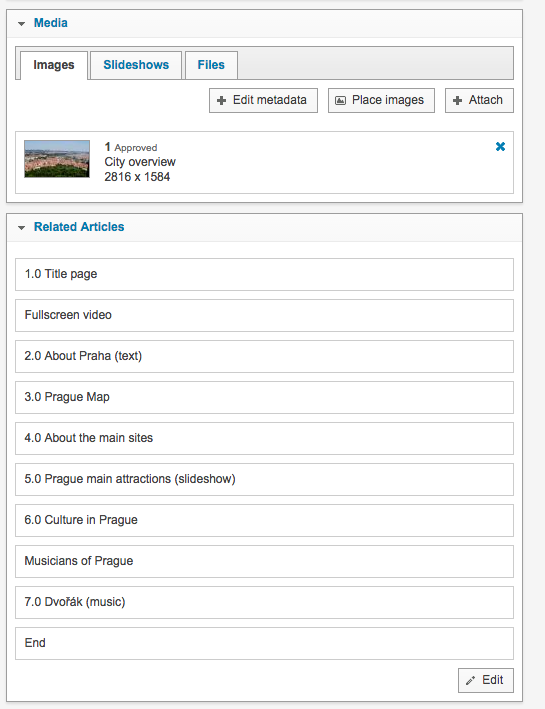
13. This is your "master article" if you will. It will act as the organizer for the entire piece. Within this article, you will find a space called the 'deck'. This is the space where you can provide a brief description of what your story is. This will be shown any time you provide a preview of the story (i.e. pasting the story link to Facebook etc.) so be sure that it is a proper description of the piece. Additionally, be sure to add an image here; this is the image that will show as a preview for your story, so make sure that you pick one that is representative of the story as a whole.
14. This "master article" is also the page where you can control the order of the content (articles) in your story. The order is dictated from top to bottom under 'related articles'. For example, the first related article you place here will be the first component of your story.
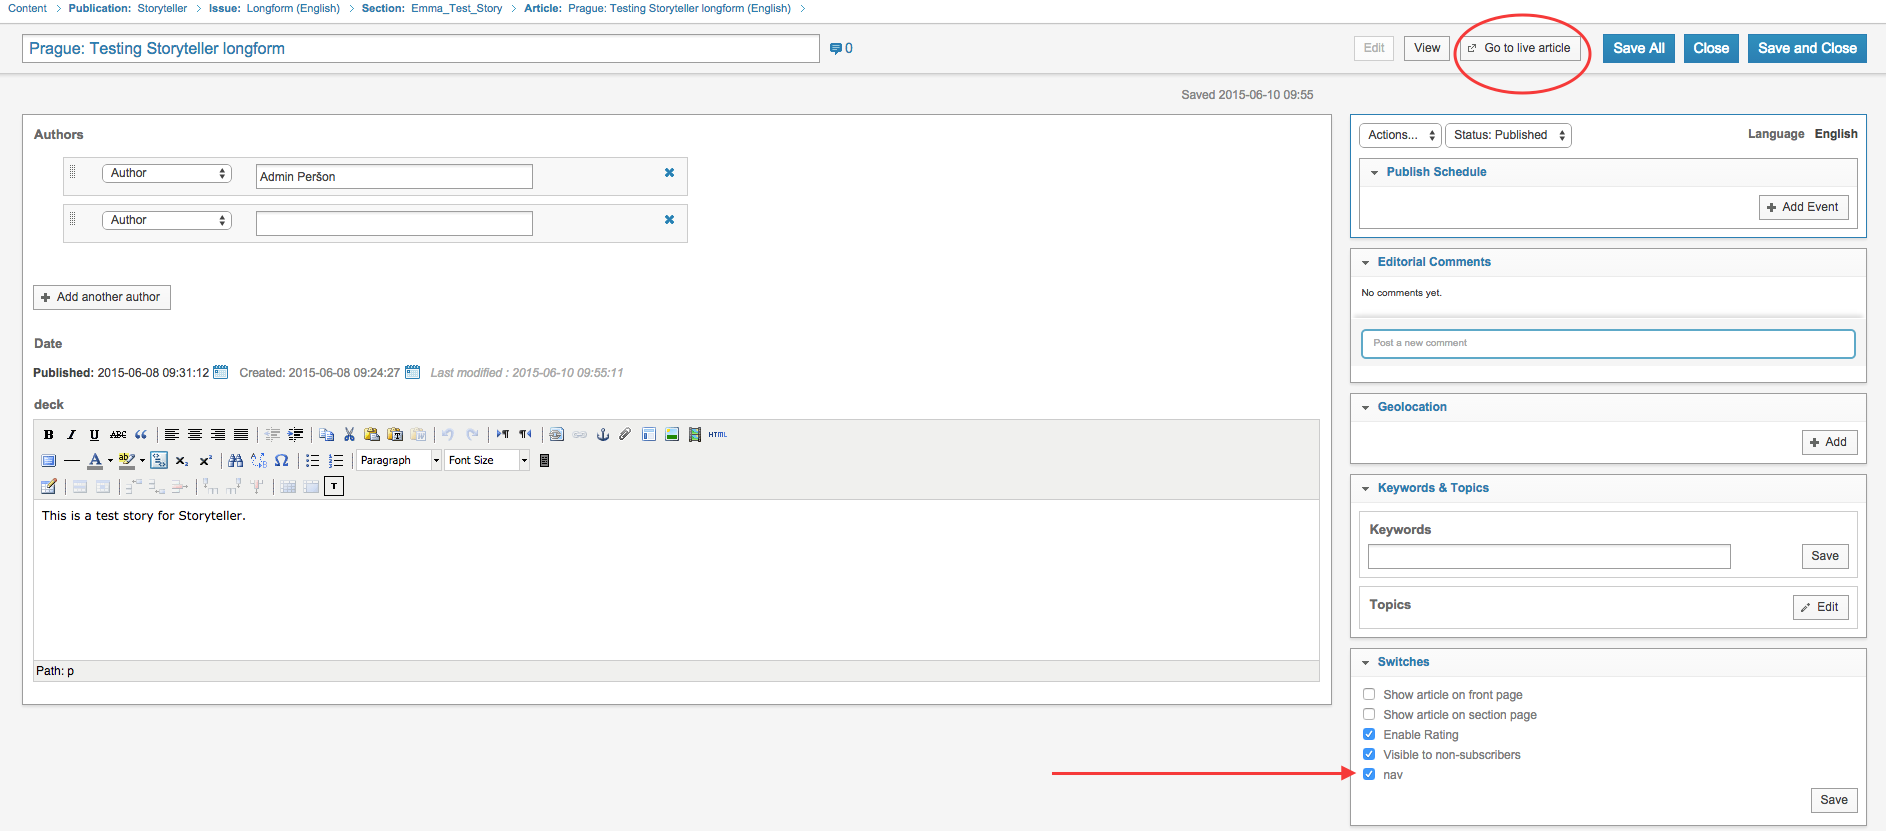
15. On this “master page” is also the location where you will be able to see a preview of your story. Come here to check how something looks by clicking on “go to live article” in the upper right-hand corner.
16. Before you leave this page, be sure to check the 'nav' option under the switches header, this will make sure that there is a navigation bar available for your story.
17. From this point forward, every article type you create will be "ST_element"