Booktype 1.6 para autores y editores
Installation on GNU/Linux
Depending on how recent your GNU/Linux distribution is, you might need to install some of Booktype's newer Python dependencies using easy_install (http://pypi.python.org/pypi/setuptools) or pip (http://pypi.python.org/pypi/pip). This is because some GNU/Linux distributions do not have new enough packages to satisfy Booktype's requirements.
First, install the development packages and Redis server (http://redis.io/). On Debian or Ubuntu, you can do this in a terminal with the apt-get command:
sudo apt-get install git-core python-dev python-setuptools python-pip libxml2-dev libxslt-dev redis-server
Next, install the remaining dependencies. The following package installs have been tested on Ubuntu Lucid 10.04. Other distributions may have new enough versions of the packages available via apt-get.
Django, minimum version 1.2 (http://www.djangoproject.com/)
sudo easy_install django
SimpleJSON (http://pypi.python.org/pypi/simplejson/)
sudo easy_install simplejson
South (http://south.aeracode.org/)
sudo easy_install South
lxml (http://codespeak.net/lxml/)
sudo easy_install lxml
Unidecode (http://pypi.python.org/pypi/Unidecode)
sudo pip install unidecode
Installing from the git repository
The git repository is an online collaboration server which contains the most up-to-date version of Booktype available.
1. Create a directory for the Booktype installation such as /var/www/mybooktype and make sure it is owned by the www-data user:
sudo mkdir /var/www/mybooktype/
sudo chown www-data:www-data /var/www/mybooktype/
Distributions other than Debian/Ubuntu may have the web server running under another username, such as httpd.
2. Download a copy of Booktype from the git repository to the /usr/local/src/ directory:
cd /usr/local/src/
sudo git clone https://github.com/sourcefabric/Booktype.git
3. Change to the Booktype/scripts directory like so:
cd Booktype/scripts
4. Switch to the www-data user for the remaining steps:
sudo su www-data
5. Create the Booktype instance:
./createbooki --check-versions --database postgresql /var/www/mybooktype/
The server will respond:
+ Trying to import Django.   [OK]
+ Trying to import booki.   [OK]
+ Trying to import lxml.   [OK]
+ Trying to import Python Imaging Library (PIL).   [OK]
+ Trying to import Redis module.   [OK]
+ Trying to import South module.   [OK]
+ Trying to import Unidecode module.   [OK]

Project directory does exist [/var/www/mybooktype]. Directory might be already created by administrator and you just need to populate it with booki project files...
 * If that is the case, type 'yes'.
 * If you are not sure, type 'no'.
Proceed anyway [yes/no] ? : yes
After entering yes and pressing the Enter key, the installation should continue:
+ Creating data directory.   [OK]
+ Creating logs directory.   [OK]
+ Creating static directory.   [OK]
+ Creating templates directory.   [OK]
+ Creating lib directory.   [OK]
+ Creating locale directory.   [OK]
+ Creating data/books directory.   [OK]
+ Creating data/profile_images directory.   [OK]
+ Creating data/cover_images directory.   [OK]
+ Creating booki.env file.   [OK]
+ Creating __init__.py file.   [OK]
+ Creating settings.py file.   [OK]
+ Creating booki.wsgi file.   [OK]
+ Creating wsgi.apache file.   [OK]
+ Creating gunicorn.nginx file.   [OK]
+ Creating factcgi.nginx file.   [OK]

Check [/var/www/mybooktype] directory for config files:
   booki.env      -  Environment variables
   booki.wsgi     -  WSGI file for Apache
   wsgi.apache    -  Apache config file
   gunicorn.nginx -  Nginx config file
   fastcgi.nginx  -  Nginx config file
   settings.py    -  Booki settings file

   templates/     -  Local Booki template files
   locale/        -  Local directory with translations
   static/        -  Local web files
   lib/           -  Local python libraries
   data/          -  Place for attachments

For further instructions read INSTALL file.
6. Change to the installation directory:
cd /var/www/mybooktype/
5. Edit the settings.py file:
nano settings.py
There are several sections of this file which need to be edited to suit your installation. First, set the name and email address of the system administrator:
# DJANGO ADMIN
ADMINS = (
    # ('Your Name', 'your_email@example.com'),
)
Enter the name and domain name of your Booktype server:
# BOOKI
BOOKI_MAINTENANCE_MODE = False

BOOKI_NAME = 'My Booktype site'
THIS_BOOKI_SERVER = 'booktype.example.com'
Enter email and outgoing mail server details:
# E-MAIL OPTIONS
REPORT_EMAIL_USER = 'booktype@example.com'

EMAIL_HOST = 'localhost'
EMAIL_PORT = 25
The database connection parameters should be similar to the following example:
# DATABASE STUFF
DATABASES = {'default': {'ENGINE': 'django.db.backends.postgresql_psycopg2',
                         'NAME': 'booktype-db',
                         'USER': 'booktype-user',
                         'PASSWORD': 'booktype-password',
                         'HOST': 'localhost',
                         'PORT': ''
                        }
            }
where booktype-password is the password that you set for the booktype-user when you created the booktype-db database in PostgreSQL.
If you have more than one application using the local Redis server, you may need to change the value of REDIS_DB to a number other than zero:
# REDIS STUFF
REDIS_HOST = 'localhost'
REDIS_PORT = 6379
REDIS_DB = 0
REDIS_PASSWORD = None
Finally, set the local time zone and the appropriate language code for your installation:
# DJANGO STUFF

AUTH_PROFILE_MODULE='account.UserProfile'

TIME_ZONE = 'Europe/London'

LANGUAGE_CODE = 'en-gb'
Press Ctrl+O to save the file and Ctrl+X to quit the nano editor.
6. Load the environment variables:
. ./booki.env
7. Initialize the database:
django-admin.py syncdb --noinput
The server should respond:
Syncing...
Creating tables ...
Creating table auth_permission
Creating table auth_group_permissions
Creating table auth_group
Creating table auth_user_user_permissions
Creating table auth_user_groups
Creating table auth_user
Creating table django_content_type
Creating table django_session
Creating table django_site
Creating table django_admin_log
Creating table south_migrationhistory
Installing custom SQL ...
Installing indexes ...
Installed 0 object(s) from 0 fixture(s)

Synced:
 > django.contrib.auth
 > django.contrib.contenttypes
 > django.contrib.sessions
 > django.contrib.sites
 > django.contrib.admin
 > django.contrib.messages
 > south
 > booki.reader
 > booki.portal

Not synced (use migrations):
 - booki.editor
 - booki.account
 - booki.messaging
 - booktypecontrol
(use ./manage.py migrate to migrate these)
8. As suggested by the output above, migrate the remaining parts of the database:
django-admin.py migrate
The server should respond:
Running migrations for editor:
 - Migrating forwards to 0007_auto__add_unique_publishwizzard_book_user_wizz_type.
 > editor:0001_initial
 > editor:0002_auto__add_field_book_hidden
 > editor:0003_attributionexclude
 > editor:0004_book_permission
 > editor:0005_auto__add_field_book_cover__add_field_book_description
 > editor:0006_auto__add_publishwizzard
 > editor:0007_auto__add_unique_publishwizzard_book_user_wizz_type
 - Loading initial data for editor.
Installed 0 object(s) from 0 fixture(s)
Running migrations for account:
 - Migrating forwards to 0001_initial.
 > account:0001_initial
 - Loading initial data for account.
Installed 0 object(s) from 0 fixture(s)
Running migrations for messaging:
 - Migrating forwards to 0003_auto__add_endpointconfig__add_field_endpoint_config.
 > messaging:0001_initial
 > messaging:0002_auto__add_field_post_snippet__add_field_post_context_url
 > messaging:0003_auto__add_endpointconfig__add_field_endpoint_config
 - Loading initial data for messaging.
Installed 0 object(s) from 0 fixture(s)
Running migrations for booktypecontrol:
 - Migrating forwards to 0002_static_user_css.
 > booktypecontrol:0001_initial
 > booktypecontrol:0002_static_user_css
 - Loading initial data for booktypecontrol.
Installed 0 object(s) from 0 fixture(s)
9. Create a superuser account for the Booktype administrator:
django-admin.py createsuperuser
Enter the required information as prompted:
Username (leave blank to use 'www-data'): admin
E-mail address: your_email@example.com
Password:
Password (again):
Superuser created successfully.
10. Start a test instance of Booktype on a port of your server which is not in use, such as 8005:
django-admin.py runserver 0.0.0.0:8005
11. Leaving the terminal running, open your web browser on the specified port at the localhost IP address of 127.0.0.1, for example http://127.0.0.1:8005/
Alternatively, if you are running Booktype on a virtual machine such as VirtualBox, then you should use the IP address of the virtual GNU/Linux server. You can use bridged mode in VirtualBox network setup to obtain a real address on the local network for the virtual machine.
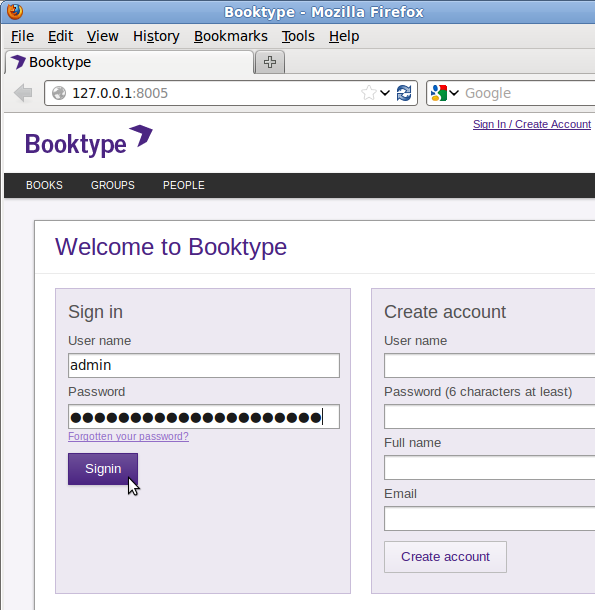
If all is well, you should see the Booktype Sign in page in your browser. You can sign in using the superuser account details that you created in the installation step above.
Once you are confident that Booktype is installed correctly, you can press Ctrl+C in the terminal to shut down the test instance. Then return to your normal user prompt in the terminal with the command:
exit
so that you are no longer entering commands as the www-data user.
Apache configuration
The standard Apache web server can be used to serve your Booktype instance to other authors and project collaborators, either on the public Internet or local networks. To use Booktype with Apache, you need to install the module for WSGI (Web Server Gateway Interface). Read the Django documentation at
http://docs.djangoproject.com/en/dev/howto/deployment/wsgi/modwsgi/ for more details.
1. Install the Apache web server (the Prefork MPM version is recommended) and the WSGI module:
sudo apt-get install apache2-mpm-prefork libapache2-mod-wsgi
2. Copy the wsgi.apache file generated during Booktype installation to the Apache configuration directory for virtual hosts:
sudo cp /var/www/mybooktype/wsgi.apache /etc/apache2/sites-available/booktype
3. Edit the configuration file for your system:
sudo nano /etc/apache2/sites-available/booktype
You should change at least the values for ServerName, ServerAdmin and SetEnv HTTP_HOST to match the domain name configured for the server.
<VirtualHost *:80>

     # CHANGE THIS
     ServerName booktype.example.com
     ServerAdmin admin@example.com
     SetEnv HTTP_HOST "booktype.example.com"
Press Ctrl+O to save the file and Ctrl+X to quit the nano editor.
4. Enable the Booktype virtual host, with the command:
sudo a2ensite booktype
5. Restart the Apache webserver with the command:
sudo invoke-rc.d apache2 restart
You should now be able to browse your Booktype instance at the URL defined in the VirtualHost configuration, such as http://booktype.example.com/ in the example above.
Subdirectory installation
It is possible to serve a Booktype instance under a URL such as http://www.example.com/booktype/ or similar. You would have to set the THIS_BOOKI_SERVER value in your project settings.py file, and adjust your Apache configuration file to point to that subdirectory.
Multi-site installation
You can have more than one Booktype instance on your server. To do this, create multiple Booktype projects under different filesystem paths such as /var/www/mybooktype2, /var/www/mybooktype3 and so on. Then copy the Apache2 configuration from each Booktype project to the Apache configuration directory /etc/apache2/sites-available/ under different names, editing the ServerName and SetEnv HTTP_HOST values for each file. You will need to ensure that the new domain names you have chosen are appropriately configured in DNS. Finally, enable each site with the a2ensite command and restart the Apache server.