Booktype 2.4 for Authors and Publishers
Editing a Chapter
Once you have created a chapter, the next step is to add content to it in the form of text and images. This is probably how you will be spending most of your time in Booktype: writing, reviewing, editing and updating chapters, as well as inserting and organising images.
In the Table of Contents for the book you are working on, click on the title of the chapter you want to edit, or on the Edit Chapter button that appears when you move your mouse pointer over it.

The Chapter editor opens, showing the chapter title and any text and images that have already been added.
Booktype's chapter editor is WYSIWYG (what you see is what you get). If you can use a word processor, you can use Booktype. And indeed, Booktype's chapter editor does look rather like a simple version of word processors such as Microsoft Word or LibreOffice.
So you can just go ahead and get typing! By default, the text you type will be in the 'Normal Text' (also known as Paragraph) style.
Zooming your view
When you're writing and editing text, you want to be comfortable with the size of that text, and with the width of the editing page on your screen.
Since Booktype is web-based, you can use your web browser's zoom function to find an on-screen text size that suits you. Zoom away to your heart's content. The size of the text in the product you output is not affected. Here, for example, is how Booktype's chapter editor might look in a maximised browser window on a typical contemporary monitor (1920 pixels wide) at your web browser's default zoom level (100%).

And here, by contrast, is how the chapter editor might look at a zoom level of 175%.

As you can see, on a large monitor most people will be better off using their browser to zoom the on-screen text. Adjusting the zoom level is quick and easy if you use the standard keyboard shortcut combination of the Control key and the + (plus) key to zoom in, and Control and - (minus) to zoom out.
If you have a mouse with a scroll wheel, zooming is even easier. Just hold down the Control key and zoom in and out using the scroll wheel.
Editing toolbar
As we've seen, Booktype's chapter editor is very reminiscent of a simple word processor, so you won't be surprised to see that at the top of the page is an editing toolbar, featuring a familiar set of tools. There are icons for undo; styles; font family, size and colour; bold, italic and underline; text alignment; bullets and numbering; indenting; and for creating links (internal and external), and inserting images.

Moving your pointer over a toolbar icon will pop up a tooltip to explain its function. Most of these are self-explanatory, but let's have a quick look at a couple of them.
Insert table
Click on the table icon to bring up the Insert Table menu.
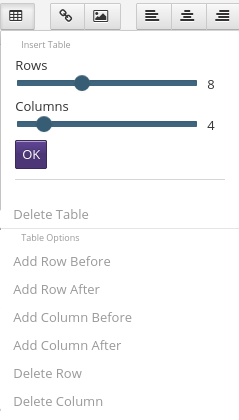
Move the sliders to set how many rows and tables you want the table to have, and click OK. Table cells can contain text or images.
You can make adjustments to the table such as inserting or deleting rows or columns at any stage by putting your cursor into the table at the relevant location and clicking the Insert Table icon. You can also delete the table completely.
Insert Link
If there is some text in the chapter which you would like to convert into a web link, select the text and then click the Insert Link icon in the toolbar.
You can also just put your cursor at a point in the text where you want to insert a link, and click the Insert Link icon.
![]()
A Link window will appear.

In the first field, enter the URL of the web page you'd like to link to. If you selected some text before you clicked Insert Link, this will appear in the second field. You can adjust it if you like. If you didn't select any text, enter some here now. Then click Insert Link. The link will appear in your text, underlined and in red.
If you need to change the link later, click anywhere on the link text and then click on the Insert Link icon in the toolbar. The Link window will appear again, and you can make the necessary changes. If you would like to remove the hyperlink while leaving the text intact, click the Break link button.
Insert Link can also be used to create links to other chapters in your book. To do this, click the Insert Link icon, click the dropdown arrow next to "or link to existing chapter", and a list of chapters you can link to will be revealed. Click the desired chapter to add its link to the URL field.
Menu items
At the left hand side of the toolbar are three menu items: Insert, Edit and Tools.
Insert
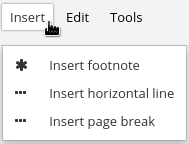
Clicking Insert footnote in the Insert menu will bring up the Footnote window. Type in your footnote text and click the Insert footnote button. A superscript number is inserted where your cursor was, and a correspondingly numbered note appears at the end of the chapter.
Also available in the Insert menu are Insert horizontal line and Insert page break.
Edit

The Edit menu contains the following features: Find & Replace; Remove styling; Remove formatting; Decrease and Increase Indent (also available in the toolbar); and Edit raw HTML.
A note on the last of those. Being built for the Web, Booktype's internal format is HTML. So it's easy for someone who knows a little HTML to edit the underlying file directly. Usually you won't need to do this. But if there's a little glitch that you can't fix in the chapter editor, you can use this menu option to bring up the HTML Edit window, in which you can make any required edits to the HTML and click the Set button when finished.
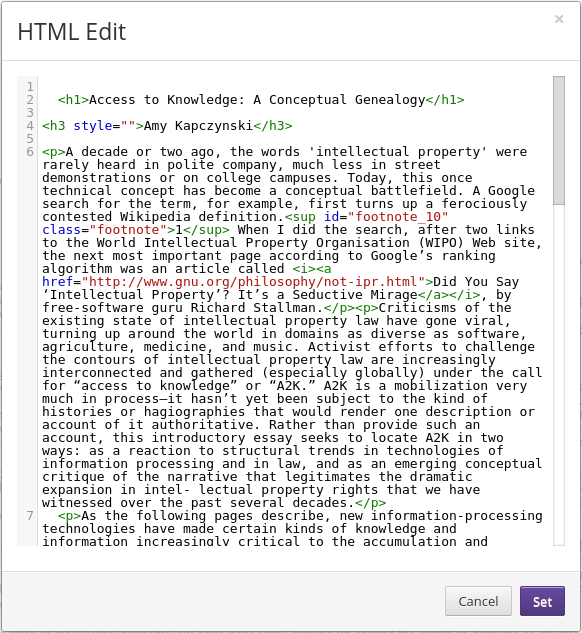
The changes you have made will be immediately visible in the chapter editor.
Tools
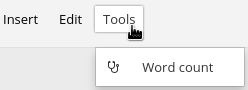
The Tools menu contains just a Word count function. As word count functions go, though, it's quite comprehensive, giving word and character counts not only for the chapter but also for the book as a whole.
Saving your work
Laptop batteries go flat. WiFi connections go down. Coffee gets split onto keyboards. To avoid such everyday incidents resulting in the loss of hours of effort, you must save your work regularly.
To save your changes, simply click the big green SAVE button.
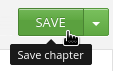
The button will turn a paler shade of green to indicate that your work has been successfully saved.
You'll notice that there is a dropdown arrow to the right of the SAVE button. If you click this arrow, three additional choices are presented.
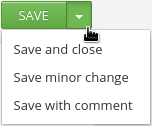
Save and close : this will save your changes and close the Chapter Editor, returning you to the book's Table of Contents.
Save minor change : this will save your changes but will prevent them from being recorded in the Book History.
Save with comment : this will bring up a window in which you can type a comment to accompany your saved changes.

Comments
Comments can help you keep track of what you have done and let your fellow contributors know about the changes you have made to the book.
Any comments you make as you save in this way will be visible in the Book History.

Tabs in the chapter editor
As we saw in the chapter The Edit Interface, there are always at least three tabs on the left-hand side of Booktype in any of the six views of the edit interface.
In the chapter editor, two more tabs are added. So, working from the top, the tabs visible in the chapter editor are:
- Table of Contents
- Online users
- Chat
- Notes
- Choose your Design
Online users, Chat and Notes are explained in the chapter Communicating.
Table of Contents tab
If you click the Table of Contents tab, a sidebar appears, with the heading Chapters.

This sidebar lists all of your book's sections and chapters. Click on the title of a chapter if you would like to open it in the chapter editor. If the chapter you are currently editing has unsaved changes, a warning will appear asking whether you want to save it. Click OK to save your changes.
If you would like to leave the chapter editor and return to the full table of contents, click the Expand ToC button. Again, if you have unsaved changes, you will be prompted to save them first.
Choose your Design tab
If you click the Choose your Design tab, a sidebar appears. There is a dropdown menu with the option 'Custom style' set by default.
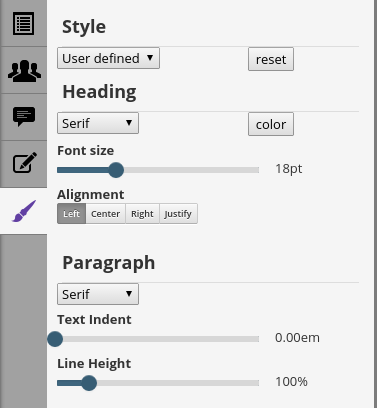
When 'Custom style' is set, controls for the modification of Heading and Paragraph styles are available in the sidebar. You can adjust the heading font family, colour, size and alignment here, as well as the paragraph font family, indent and line height. Adjustments are made to the chapter text immediately, so that you can view the results of these changes in the editing window. Click the reset button to return to the default style attributes.
If you choose one of the pre-defined themes available on the dropdown menu, which have names set by the designer such as Academic, the adjustment controls are not available because each of the pre-defined themes is fixed.