Newscoop 4.2 for Journalists and Editors
Installation on Red Hat Enterprise
Ready made packages of Newscoop are available for Red Hat Enterprise Linux 6 via yum. This is the recommended installation method for Newscoop, because it offers automatic updates and resolution of package dependencies. This guide assumes that you have root powers on the target server - if not, you need to ask your system administrator to install Newscoop for you.
Subscribing to updates
A Red Hat Enterprise Linux server must be registered and subscribed to updates before it can download packages required for Newscoop to run. To list existing subscriptions, you can use the command (as the root user):
subscription-manager list
To register and subscribe a new server, you can use the commands:
subscription-manager register
subscription-manager subscribe --auto
You will need a Red Hat Network username and password in order to register the server. After subscription it is recommended that you update the server to the latest packages available, with the command:
yum update
For more details, please read the Red Hat Enterprise Linux Deployment Guide at: https://access.redhat.com/site/documentation/en-US/Red_Hat_Enterprise_Linux/
Setting up the Sourcefabric yum repository
For a Red Hat Enterprise Linux 6 server, open the file /etc/yum.repos.d/sourcefabric-rhel6.repo in an editor:
vi /etc/yum.repos.d/sourcefabric-rhel6.repo
and add the following lines:
[sourcefabric]
name=Sourcefabric's YUM repo
baseurl=http://yum.sourcefabric.org/RHEL6/$basearch/
enabled=1
gpgcheck=1
gpgkey=http://yum.sourcefabric.org/RPM-GPG-KEY

[sourcefabric-source]
name=Sourcefabric's YUM repo - Source
baseurl=http://yum.sourcefabric.org/RHEL6/source/
enabled=1
gpgcheck=1
gpgkey=http://yum.sourcefabric.org/RPM-GPG-KEY
In the vi editor, press the Insert key to start editing, and the Escape key to enter a command. The command to write the file and quit is :wq followed by the Enter key. Then update the package list, with the command:
yum update
This command will also upgrade Newscoop, if it has been installed on the server using the yum method or .rpm package previously.
Installing the Newscoop package
1. Open a terminal, use the su command to switch user to root if required, and enter the commands to install the dependency packages:
yum install php php-gd php-mysql php-xml ImageMagick system-config-firewall
Depending on the configuration of your server, you may have some of these packages installed already. The httpd package for the Apache web server should be installed as a dependency of the php package. See the chapter MySQL installation for details of database setup.
2. Download and install the Newscoop package with:
yum install newscoop
If this is the first time you have installed a package from the Sourcefabric yum repository on this server, you will be prompted to import a GPG package signing key, by pressing the y key.
3. Edit the VirtualHost directive in /etc/httpd/conf.d/newscoop.conf to uncomment the ServerName line, and add a fully qualified domain name such as example.com there. (On Red Hat based distributions, the hostname is set with the line HOSTNAME= in the file /etc/sysconfig/network). You may also wish to set a ServerAlias such as www.example.com and an email address for the ServerAdmin. The directive should point to a DocumentRoot of /var/lib/newscoop/
<VirtualHost *:80>

    ServerName example.com
    ServerAlias www.example.com
    ServerAdmin admin@example.com

    DocumentRoot /var/lib/newscoop

    <Directory /var/lib/newscoop>
       Options -Indexes +FollowSymLinks -MultiViews
       AllowOverride All
       Order allow,deny
       Allow from all
    </Directory>

</VirtualHost>
Officially, Red Hat Enterprise Linux version 6 supports Apache 2.2. If you have upgraded your Red Hat server to Apache 2.4, you will need to replace the lines:
       Order allow,deny
       Allow from all
with the following line:
Require all granted
4. Optionally, install the APC cache for improved performance:
yum install php-pecl-apc
5. Configure Apache to start when the server boots, then make sure it has started, with the commands:
chkconfig --levels 235 httpd on
service httpd start
6. Check the crontab (scheduled tasks) installed for the apache user, with the command:
crontab -u apache -e
The output of this command should be similar to:
* * * * * /var/lib/newscoop/bin/newscoop-autopublish
0 */4 * * * /var/lib/newscoop/bin/newscoop-indexer --silent
0 */8 * * * /var/lib/newscoop/bin/subscription-notifier
*/2 * * * * /var/lib/newscoop/bin/events-notifier
0 */4 * * * /var/lib/newscoop/bin/newscoop-statistics
If this is a new install, you will need to enter these commands and save the file. The default editor for the crontab supports vi editor commands.
Firewall configuration
By default, the Red Hat firewall does not allow other machines to connect to running services. You can configure the firewall to allow the Apache web server to be accessed from the local network or public Internet, with the command:
system-config-firewall
This command runs a wizard which will guide you through the adjustment of firewall rules.
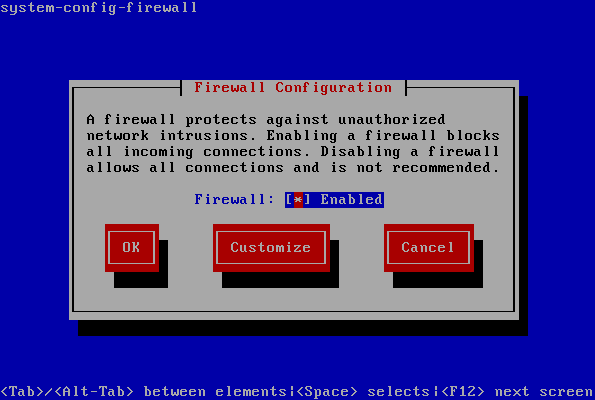
Using the Tab key to navigate, and leaving Firewall set to Enabled, select the Customize button by pressing the Enter key.
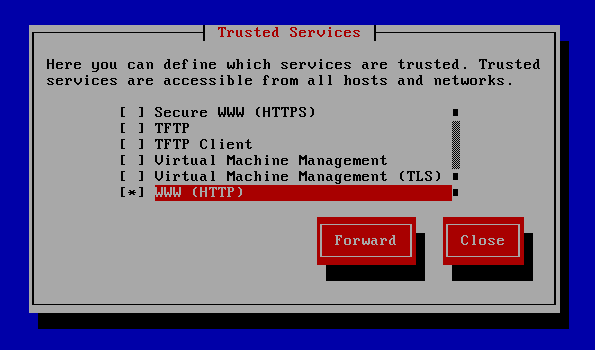
On the Trusted Services page, use the down arrow key to find WWW (HTTP) for the Apache web server, then select it by pressing the Space bar. Then Tab to select the Forward button and press the Enter key to continue.
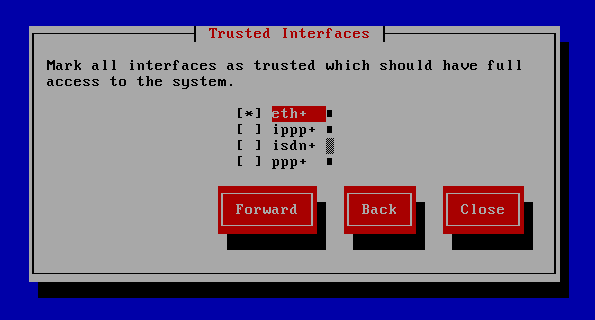
Select the Forward button again to skip the Other Ports page. Then on the Trusted Interfaces page, press the Space bar to select eth+ for the Ethernet cards of your server:
You can skip the Masquerading, Port Forwarding and ICMP Filter pages by selecting the Forward button again, unless you have special requirements. On the Custom Rules page, select the Close button and press the Enter key.
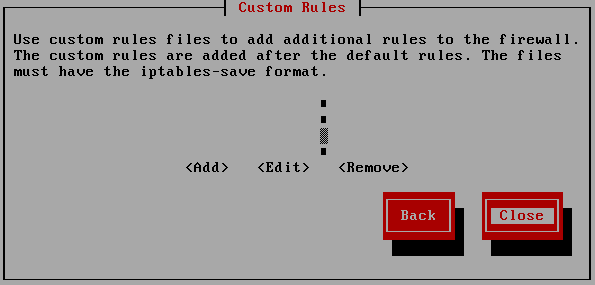
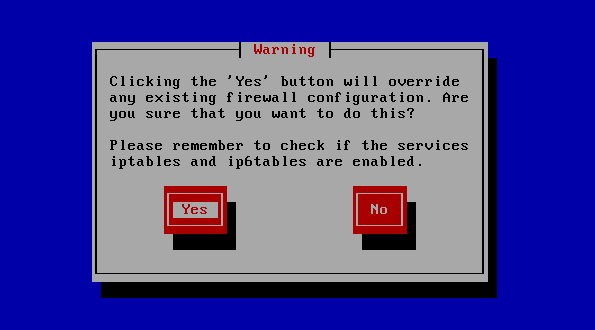
You will now be asked if you wish to override the existing firewall configuration. Select the Yes button to continue.
This action will return you to the Firewall Configuration page, where you can select OK to return to the console prompt.
Finally, check that Newscoop is running and accessible. Open a web browser with the URL of the web server that you have installed, such as http://www.example.com. For a test installation accessed from the same machine, this URL might be:
http://localhost/
If you see the Newscoop installer page, you can now skip the chapter Manual installation and proceed to the chapter Installation steps.