Newscoop 4.1 for Journalists and Editors
Manual installation
The following manual installation method is intended for more experienced system administrators, and assumes that you have sudo or root powers on the target server. If ready-made packages of Newscoop are not available for your GNU/Linux distribution of choice, you can install the software manually using the tarball available for download from Sourcefabric:
http://newscoop.sourcefabric.org/
Dependencies
Before performing a manual installation, you will have to verify that all of the dependency packages that Newscoop requires are already installed and working. These dependencies are:
1. Apache web server (http://www.apache.org) version 2.0.x or newer.
On Debian or Ubuntu GNU/Linux, you can install the apache2 metapackage, which will install all of the web server packages you need.
sudo apt-get install apache2
On Red Hat Enterprise, you can install Apache using the httpd package and configure it to start on boot with these commands (as root):
yum install httpd
chkconfig --levels 235 httpd on
service httpd start
2. MySQL database management system (http://www.mysql.com) version 5.0 or newer. See the chapter MySQL installation for details.
3. PHP scripting language (http://www.php.net) version 5.3 or newer.
The following PHP modules must be installed:
- php5-cli - Command Line Interface module
- php5-mysql - functions for accessing the MySQL database server
- php5-gd - provides a module for handling graphics from PHP scripts
These modules have the same names in the equivalent Debian/Ubuntu packages, which you can install with the command:
sudo apt-get install php5-cli php5-mysql php5-gd
On Red Hat Enterprise, you can install these packages with:
yum install php php-gd php-mysql
The php-cli package is installed automatically as a dependency of the php package on Red Hat Enterprise. You will also need the PHP module for the Apache web server, which has the package name libapache2-mod-php5 in Debian/Ubuntu. This package should be installed automatically as a dependency when installing the PHP packages mentioned above.
4. ImageMagick (http://www.imagemagick.org).
Needed for creating thumbnails of images. Available in Debian/Ubuntu's imagemagick package:
sudo apt-get install imagemagick
and in Red Hat Enterprise with:
yum install ImageMagick
All of these Newscoop dependencies are available as standard packages in most GNU/Linux distributions. You should be able to find them using your distribution's software package manager, although the exact package names can vary from the examples given above for Debian/Ubuntu and Red Hat Enterprise.
Setting up the database user and password
An existing Newscoop installation should have a named database already set up on a MySQL server, with access protected by a username and password. For a new installation of Newscoop, you will need to tell the installer to create a database to store your content in. See the chapter MySQL installation for details.
PHP modules
On Debian or Ubuntu, the PHP modules that you have installed should be configured automatically, with an entry for each module added to the /etc/php5/apache2/conf.d/ directory. You can also create your own PHP customization options using files in that directory, which should not be overwritten when the main php.ini file is upgraded. Red Hat Enterprise also sets up these modules automatically.
On other distributions of GNU/Linux, you may need to add a line for each module to the php.ini file, such as /etc/php5/apache2/php.ini or similar. The following extensions should be enabled. If the line is already present but starts with the semi-colon comment ';' you will need to remove this character for the corresponding extension to work.
extension=gd.so
extension=mysqli.so
extension=mysql.so
PHP configuration
On any GNU/Linux distribution, the php.ini file contains some default settings which should be checked or adjusted to enable optimum Newscoop performance and security. You can do this by opening the file in your text editor, such as nano:
sudo nano /etc/php5/apache2/php.ini
This is a long file, so use the search tool in nano (Ctrl+W) to find the lines you want. The recommend settings are that you should:
1. Turn off register_globals because it's a potential security hole:
register_globals = Off
2. Set the amount of memory available to at least 128MB:
memory_limit = 128M
3. Turn off magic quotes:
magic_quotes_gpc = Off
4. Allow HTTP file uploads:
file_uploads = On
The values above are the default settings on Debian or Ubuntu. You may wish to adjust the following two settings, which affect the maximum size of media that Newscoop users can upload.
5. The maximum size of POST data that PHP will accept defaults to 8MB on Debian/Ubuntu. You may find that you need to set this higher, for example:
post_max_size = 100M
6. The maximum allowed size for uploaded files defaults to 2MB on Debian/Ubuntu. This is likely to be insufficient for large multimedia attachments, so you may wish to set this value higher. However, it must not be higher than the maximum POST size set above, otherwise large uploads may fail.
upload_max_filesize = 100M
7. You may also wish to disable automatic session garbage collection, which can cause fatal PHP errors if your server runs Debian or Ubuntu. These GNU/Linux distributions use a cron job /etc/cron.d/php5 to perform garbage collection instead.
session.gc_probability = 0
Apache configuration
The Apache web server's configuration will need to be adjusted to set the path to the Newscoop files and templates. On Debian or Ubuntu, Apache configuration files are usually found in the /etc/apache2/sites-available/ directory.
1. Create a file such as newscoop containing a virtual host definition.
sudo nano /etc/apache2/sites-available/newscoop
For a publication with the domain name www.example.com, you could use a virtual host definition like the following:
<VirtualHost *:80>
      DocumentRoot /var/www/newscoop
      ServerName example.com
      ServerAlias www.example.com
      DirectoryIndex index.php index.html
      <Directory /var/www/newscoop>
              Options -Indexes FollowSymLinks MultiViews
              AllowOverride All
              Order allow,deny
              Allow from all
      </Directory>
</VirtualHost>
Make sure that the DocumentRoot directory that you set in the virtual host definition actually exists, otherwise Apache will complain when it starts up.
$ sudo mkdir -p /var/www/newscoop
If the ServerName or ServerAlias that you are using is not yet set up in DNS for this particular machine's IP address, you can create a temporary hostname in your /etc/hosts/ file which will enable you to test the installation locally.
2. Disable the default Apache configuration, if you aren't using it.
sudo a2dissite default
Site default disabled.
Run '/etc/init.d/apache2 reload' to activate new configuration!
3. Enable the Newscoop configuration that you just created.
sudo a2ensite newscoop
Enabling site newscoop.
Run '/etc/init.d/apache2 reload' to activate new configuration!
4. You may also need to enable Apache's rewrite and php5 modules. On Debian/Ubuntu, you can do this with the a2enmod command:
sudo a2enmod rewrite php5
The server should respond:
Enabling module rewrite.
Module php5 already enabled
Run '/etc/init.d/apache2 restart' to activate new configuration!
5. Restart Apache as suggested by the output of the command above, so that the Newscoop configuration and the new modules can be loaded:
sudo /etc/init.d/apache2 restart
The server should respond:
* Restarting web server apache2 [ OK ]
Installing Newscoop
1. Extract the Newscoop tarball that you downloaded in your working directory. This action will generate a directory named newscoop- with a version number suffix. (A beta version may have an additional suffix on the extracted directory, such as -BETA4).
tar -xvzf newscoop-4.1.0.tar.gz
2. Examine the contents of the extracted directory with the ls command.
ls newscoop-4.1.0
The output of this command should appear similar to:
admin-files	 cache		 extensions   install	   README.txt
admin.php	 ChangeLog.txt	 favicon.ico  INSTALL.txt  robots.txt
admin-style	 classes	 files	      js	   scripts
application	 conf		 get_img.php  library	   template_engine
application.php  COPYING.txt	 htaccess     log	   themes
attachment.php	 CREDITS.txt	 images       pdf	   upgrade.php
backup		 db_connect.php  include      plugins	   UPGRADE.txt
bin		 docs		 index.php    public	   videos
3. Move the contents of the extracted directory into the DocumentRoot directory of the Apache VirtualHost that you set up, such as /var/www/newscoop/
sudo mv newscoop-4.1.0/* /var/www/newscoop/
If you wish to install Newscoop into a subdirectory of the DocumentRoot, for example /var/www/newscoop/subdirectory/ your Newscoop site will be visible at the http://www.example.com/subdirectory/ URL. This method is useful for adding Newscoop to an existing site without changing the contents of the DocumentRoot directory, which might be static pages or other archived content.
4. Change the ownership of the DocumentRoot directory to the username of the web server, for instance www-data on Debian or Ubuntu.
sudo chown -R www-data.www-data /var/www/newscoop/
5. Open a web browser with the URL of the Apache ServerName or ServerAlias that you set up earlier. If you see the Newscoop installer page, you are ready to proceed through the Installation steps chapter.
Shared hosting without root access
Some shared hosting servers provide administration tools such as cPanel or vDeck instead of root access in a shell. It is usually possible to install Newscoop on this type of server if you create a MySQL database user and Apache configuration before copying the Newscoop files to the server's web root directory via FTP or SFTP. You would then access the Newscoop installer at the domain name configured in the Apache page of the control panel.
If you cannot access the Newscoop installer page after copying the files to a vDeck server, and you see a 403 Forbidden error instead, you may need to make an adjustment to the server's .htaccess file. Open the .htaccess editor in the vDeck control panel, and set a Default Page instruction to point to the index.php file in the web root directory of your Apache configuration. Then refresh your browser window on the domain name you have configured.
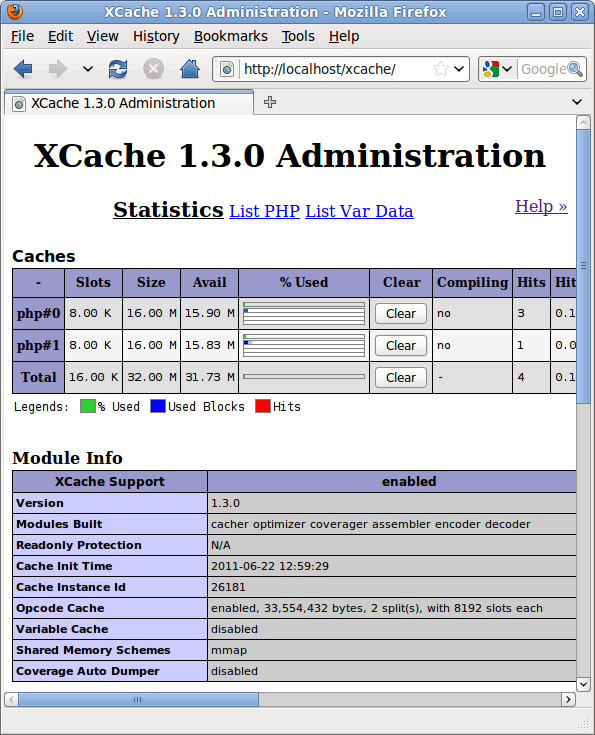
Installing XCache
This step is optional, but highly recommended for optimum Newscoop performance. On Ubuntu, you can install XCache (http://xcache.lighttpd.net/) with the following command:
sudo apt-get install php5-xcache
You may wish to adjust the XCache configuration for your particular requirements:
sudo nano /etc/php5/conf.d/xcache.ini
On a Debian or Ubuntu server with two processors, example adjustments to the default configuration might be:
; Configure this to use admin pages
xcache.admin.user = "my_admin_name"

; xcache.admin.pass = md5($your_password)
xcache.admin.pass = "5f4dcc3b5aa765d61d8327deb882cf99"

; to enable : xcache.size=64M etc (any size > 0) and your system mmap allows
xcache.size  =                32M

; set to cpu count (cat /proc/cpuinfo |grep -c processor)
xcache.count =                 2

; for *nix, xcache.mmap_path is a file path, not directory.
xcache.mmap_path =    "/var/cache/xcache"
The value of xcache.admin.pass shown above is just an example. You should generate your own md5 hashed password using a piped command such as:
echo -n "password"|md5sum
You can set up your Apache VirtualHost to allow administrator access to the XCache statistics page from the localhost, or a specific IP address that you determine. Add a stanza like the following to the VirtualHost definition that you created earlier, before the closing </VirtualHost> tag:
# php xcache stats
Alias /xcache/ /usr/share/xcache/admin/
<Directory "/usr/share/xcache/admin/">
    AllowOverride None
    Options ExecCGI
    Order allow,deny
    Allow from localhost
</Directory>
Then reload the Apache configuration again:
sudo /etc/init.d/apache2 reload
The xcache statistics page should now be visible under the /xcache/ path on your web server, such as http://localhost/xcache/ if you have enabled access from the localhost only.