Newscoop 4.1 Cookbook
Content access, Authorization & password retrieval
Newscoop templates can be constructed in a way that they deliver content depending on the status of the user (logged in or not). Journalists and editors then need to switch off the 'Visible to non-subscribers' option on the article edit screen, in order to restrict access to the article.
Controlling content and functionality access
You can check if the reader is logged in with $gimme->user->logged_in:
{{ if $gimme->user->logged_in }}
  {{ include file="_tpl/article-comments.tpl" }}
{{ else }}
  Register and log in to comment
{{ /if }}
You can check if the user has access to content with $gimme->article->content_accessible. What you do with this information is up to you. You can still deliver the same content if you want, or you can only deliver parts of it. Here are two examples to illustrate this. First, truncate the article for readers who are not allowed access yet:
{{ if $gimme->article->content_accessible }}
  {{ include file="_tpl/article-fullcontent.tpl" }}
{{ else }}
   {{ $gimme->article->full_text|truncate:300 }}
   <em>Buy a subscription today to get full access!</em>
{{ /if }}
Or display relevant information in classified ads to readers who have subscribed, like this:
{{ $gimme->article->ad_text }}<br/>Contact:
{{ if $gimme->article->content_accessible }}
  <a href="mailto:{{ $gimme->article->ad_email }}">{{ $gimme->article->ad_email }}</a>
{{ else }}
  Subscribe for contact information.
{{ /if }}
Registration, login and subscription templates
Your job gets much more complicated if you need to provide the entire functionality circle:
- Login option for your publication's existing users
- Register option for new users
- Account page for users to check or change their personal information, including changing their password
- Option to resend lost or forgotten passwords
- Logout option
User management in Newscoop now uses Zend framework controller's power. Templates with predefined names (as it is done in The New Custodian) should be put in theme's root folder. If they are not there, default Zend controller templates will be used, from the Newscoop instance folder /application/views/scripts.
Authorization templates
Code for frontpage, taken from The New Custodian's _tpl/sidebar-loginbox.tpl, looks like this:
{{ dynamic }}
 {{ if $gimme->user->logged_in }}
 <p>Welcome, <a href="{{ $view->url(['controller' => 'dashboard', 'action' => 'index'], 'default') }}">{{ $gimme->user->first_name }} {{ $gimme->user->last_name }}</a> | <a href="{{ $view->url(['controller' => 'auth', 'action' => 'logout'], 'default') }}?t={{ time() }}">Logout</a></p>
 {{ else }}
 <li><a href="{{ $view->url(['controller' => 'auth', 'action' =>'index'], 'default') }}">Login and get involved!</a></li>
 {{ /if }}
 {{ /dynamic }}
The first thing that a reader needs is the option to login or register. On front page we can link to authorization page (as in the example above), or put form there directly. In The New Custodian case, we have special page for login and register actions, and it's code is as follows (from template auth_index.tpl)
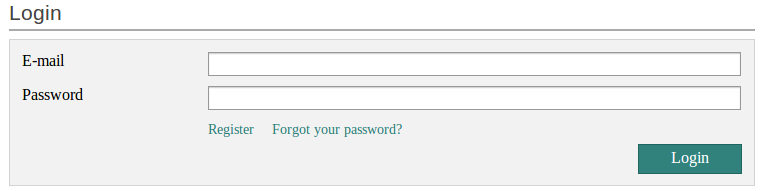
<form action="{{ $form->getAction() }}" method="{{ $form->getMethod() }}">
<fieldset>
{{ if $form->isErrors() }}
<div>
<h5>Login failed</h5>
<p>Either your email or password is wrong.</p>
<p>Try again please!</p>
<p><a href="{{ $view->url(['controller' => 'auth', 'action' => 'password-restore']) }}">Forgot your password?</a></p>
</div>
{{ /if }}
</fieldset>
<fieldset>
<dl>
{{ $form->email->setLabel("E-mail")->removeDecorator('Errors') }}
{{ $form->password->setLabel("Password")->removeDecorator('Errors') }}
<dt> </dt>
<dd>
<span>
<a class="register-link" href="{{ $view->url(['controller' => 'register', 'action' => 'index']) }}">Register</a>
<a class="register-link" href="{{ $view->url(['controller' => 'auth', 'action' => 'password-restore']) }}">Forgot your password?</a>
 </span>
 </dd>
 </dl>
 <div>
 <input type="submit" id="submit" value="Login" />
 </div>
 </fieldset>
</form>
Registration templates
Registration process is divided in several steps. First one is just submitting email - then activation link is sent to the provided address, and upon user follows provided link, final action happens.
register_index.tpl from The New Custodian is doing this first step - providing the form for user to submit his email.
<h3>Register</h3>
<div>
{{ $form }}
<script type="text/javascript">
$('#email').change(function() {
 $.post('{{ $view->url(['controller' => 'register', 'action' => 'check-email'], 'default') }}?format=json', {
 'email': $(this).val()
 }, function (data) {
 if (data.status) {
 $('#email').css('color', 'green');
 } else {
 $('#email').css('color', 'red');
 }
 }, 'json');
}).keyup(function() {
 $(this).change();
});
</script>
</div>
Next step is in template register_after.tpl; this template simply informs user that the activation link is sent to his email address.
<h3>Confirmation has been sent.</h3>
<div>
 <p>Follow the steps you will find in your email.</p>
 <p>Thanks for registering.</p>
</div>
And then the page that opens is defined by the template register_confirm.tpl
<h3>Please fill in your data</h3>
<fieldset>
{{ $form }}
<script type="text/javascript">
$('#first_name, #last_name').keyup(function() {
 $.post('{{ $view->url(['controller' => 'register', 'action' => 'generate-username'], 'default') }}?format=json', {
 'first_name': $('#first_name').val(),
 'last_name': $('#last_name').val()
 }, function (data) {
 $('#username').val(data.username).css('color', 'green');
 }, 'json');
});
$('#username').change(function() {
 $.post('{{ $view->url(['controller' => 'register', 'action' => 'check-username'], 'default') }}?format=json', {
 'username': $(this).val()
 }, function (data) {
 if (data.status) {
 $('#username').css('color', 'green');
 } else {
 $('#username').css('color', 'red');
 }
 }, 'json');
}).keyup(function() {
 $(this).change();
});
</script>
</fieldset>
Retriving forgotten password
Similarly, process of retreiving new password is controlled by Zend framework controllers, and pre-defined templates are executed in this order
auth_password-restore.tpl
{{ assign var="userindex" value=1 }}
<header>
 <h3>Reset your password</h3>
</header>
<form action="{{ $form->getAction() }}" method="{{ $form->getMethod() }}">
 <fieldset>
 {{ if $form->email->hasErrors() }}
 <div>
 <h5>E-mail is not correct</h5>
 <p>Maybe you registered on <em>{{ $gimme->publication->name }}</em> with another e-mail account?</p>
 </div>
 {{ /if }}
 </fieldset>
 <fieldset>
 <dl> {{ $form->email->setLabel("E-Mail")->removeDecorator('Errors') }}</dl>
 <div>
 <input type="submit" id="submit" class="button" value="Request new password" />
 </div>
 </fieldset>
</form>
Next, template auth_password-restore-after.tpl generates the message for the user about e-mail message whch containes link to the page with change password action
<header>
 <h3>User account</h3>
</header>
<div>
 <h5 class="checkHeading">We've sent you an e-mail</h5>
 <p>Please check your inbox and click on the link in the email to reset your password.</p>
</div>
Finally, auth_password-restore-finish.tpl does the required action -
<form action="{{ $form->getAction() }}" method="{{ $form->getMethod() }}">
<fieldset>
{{ if $form->isErrors() }}
<div>
<p>Your password could not be changed. Please follow the instructions and try again.</p>
</div>
{{ /if }}
</fieldset>
<fieldset>
<dl>
{{ $form->password->setLabel("New Password")->removeDecorator('Errors') }}
{{ if $form->password->hasErrors() }}
<dt> </dt>
<dd>
<span>Please enter your new password (minimum 6 characters)</span>
</dd>
{{ /if }}
</dl>
<dl>
{{ $form->password_confirm->setLabel("Retype your password")->removeDecorator('Errors') }}
{{ if $form->password_confirm->hasErrors() && !$form->password->hasErrors() }}
<dt> </dt>
<dd>
<span class="error-info">The confirmation of your password does not match your password.</span>
</dd>
{{ /if }}
</dl>
<div>
 <input type="submit" id="submit" class="button" value="Save password" />
 </div>
 </fieldset>
 </form>
User dashboard
User dashboard is the page where user is directed to check and replace it's personal info. The page is acccessible once user is logged in - it is where you get from the first page after clicking your name in welcome/login box.![]()
dashboard_index.tpl is as follows:
<script>
function afterRegistration() {
 location.reload();
}
</script>
<h3>Welcome, {{ $user->name }}</h3>
<figure>
 <img src="{{ include file="_tpl/user-image.tpl" user=$user width=156 height=156 }}" style="max-width: 100%" rel="resizable" />
</figure>
<div>
{{ $form }}
</div>